
Using mesibo with Cross Platform Application Development Tools like Flutter, Xamarin, React-Native, Swift, Ionic, etc.
Cross-Platform frameworks and libraries like React-Native, Flutter, etc. have made it possible to build applications for Mobile and Web quickly. In this article, we will briefly talk about various cross-platform tools and how to use mesibo in your favorite cross-platform tool.
It is worth remembering that although each cross-platform tool has it's own language and APIs, under the hood, it invokes native APIs - that is Objective-C (for iOS) or Java (for Android). In short, all the cross-platform APIs are wrappers around the native APIs, as shown below.
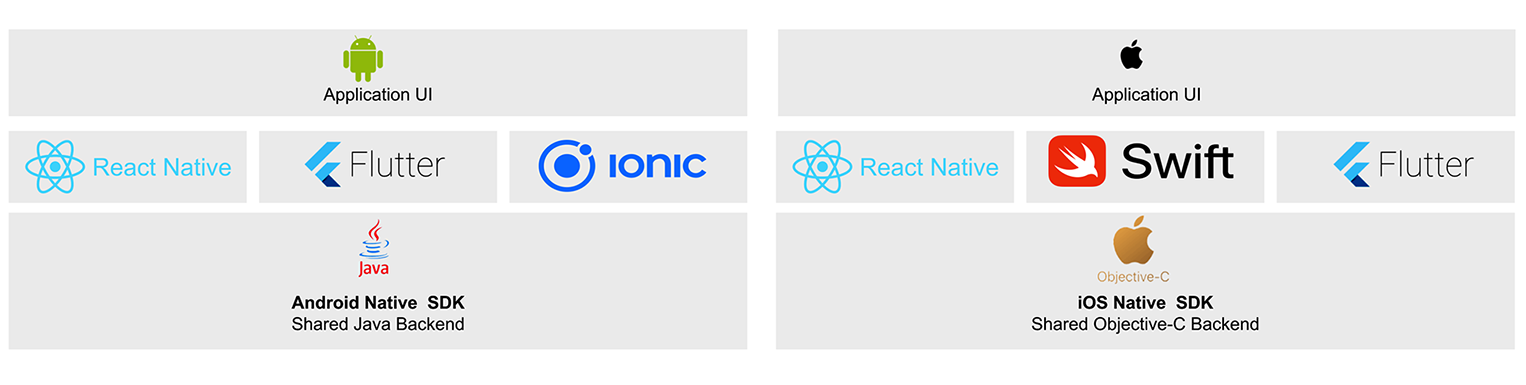
mesibo APIs are provided as a Native SDK for Android, iOS, and Web. Since all the cross-platform tools offer a way to access native APIs, you can use mesibo from the platform of your choice. In the following sections, we'll look at integrating mesibo with some of the popular frameworks like Flutter, Xamarin, Swift, React-Native, Xamarin, Ionic, etc. Sample applications and documentation are also provided using which you can quickly get started with using mesibo in your cross-platform apps.
Access mesibo APIs from Cross-Platform Frameworks
Swift
To use Mesibo from Swift, you need to use Bridge Headersopen_in_new. Once you include bridge headers in your code, you can use all the mesibo APIs from your Swift app.
You can find the Swift version of Mesibo Messenger on GitHubopen_in_new. Mesibo messenger is an open-source Swift app (similar to Whatsapp) to send messages and make voice and video calls. It shows you how to use Mesibo core API, and UI modules to send a message and make voice and video calls from your Swift App.
Step-1: Import Code Within an App Target
Xcode offers to create the bridge header when you add a Swift file to an existing Objective-C app, or an Objective-C file to an existing Swift app. The created header file will be your product module name followed by "-Bridging-Header.h". Alternatively, you can create a bridging header yourself by choosing File > New > File > [operating system] > Source > Header File.
Step-2: Expose Objective-C code to Swift
Edit the bridging header to expose your Objective-C code to your Swift code:
In your Objective-C bridging header, import every Objective-C header you want to expose to Swift.
In Build Settings, in Swift Compiler - Code Generation, make sure the Objective-C Bridging Header build setting has a path to the bridging header file. The path should be relative to your project, similar to the way your Info.plist path is specified in Build Settings. In most cases, you won't need to modify this setting.
Step-3: Import Code Within a Framework Target
Import your Objective-C files by configuring the umbrella header:
Under Build Settings, in Packaging, make sure the Defines Module setting for the framework target is set to Yes.
In the umbrella header, import every Objective-C header you want to expose to Swift.
Now, your application will interface with the iOS Native SDK Component from Swift.
React Native
React Nativeopen_in_new is a way to develop mobile apps using React and JavaScript. To integrate React Native with Mesibo you need to create a native module that acts as a bridge between Mesibo and React-Native.
Refer to the sample application tutorial for integrating React Native with Mesiboopen_in_new
Follow the steps below:
- Create a new react-native project and initialise it.
react-native init ProjectMesiboThis will provide you App.js where you need to develop your UI component in Javascript.
2.Create a native module that acts as a bridge between Mesibo and React-Native. For example , MesiboModule.js
import {NativeModules} from 'react-native';
module.exports = NativeModules.MesiboModule;- Import Mesibo SDK and initialize it in the native part of Android/iOS For example in Android
import com.mesibo.api.mesibo;- Now,edit
App.jsto add UI components and call Mesibo Methods by importingMesiboModule.js
import MesiboModule from './MesiboModule';- Start the React Native server and run your native app.
That's it! You have sucessfully integrated Mesibo with React-Native.